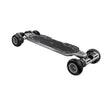
Whether you're cruising through city streets or carving up bike paths, proper maintenance is the secret sauce that keeps your e-board riding smooth, safe, and exhilarating. This guide will dive into two crucial aspects of e-board care: belt tensioning and tire replacement. These might sound intimidating at first, but don't worry – we'll break everything down into simple, manageable steps.
Why Electric Skateboard's Belt and Tire Maintenance Matters
You might be wondering: why focus so much attention on belts and tires? Well, these two components are essentially the unsung heroes of your electric skateboard's performance and safety.

Think of drive belts as the crucial link between your motor's power and your wheels. They're constantly working under stress, transferring the force that propels you forward and helps you brake. When belts are improperly tensioned, you might experience several issues: delayed acceleration, inconsistent braking, unusual noises, or even complete belt failure – none of which you want to discover mid-ride.
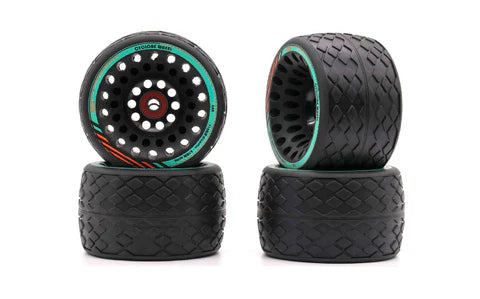
As for tires, they're your only point of contact with the ground. Whether you're riding pneumatic (air-filled) or solid urethane wheels, their condition directly affects your grip, stability, and overall riding comfort. Worn-out tires can make it much harder to control your vehicle, especially during wet conditions or when taking corners. Also, they can make the ride more rough than it needs to be, which can increase the risk of losing control.
Both these components naturally wear down over time, but here's the good news: with regular maintenance, you can:
- Prevent sudden breakdowns during rides
- Maintain consistent performance and responsiveness
- Save money by extending component life
- Ensure safer riding conditions
- Identify potential issues before they become serious problems
Now that we understand why maintenance is crucial, let's roll up our sleeves and get into the practical steps of belt tensioning and tire maintenance. First, let's look at how to properly check and adjust your belt tension...
Pro Tip: Always make sure you are safe before you jump in. Disconnect the battery and make sure the electric skateboard is fully off before you start any repair work. Take detailed pictures of your board's parts before taking it apart. This will save you a lot of trouble later on. These pictures will help you a lot when you're putting things back together, especially if this is your first time doing maintenance.
How to Tension Electric Skateboard Belts
Take a close look at your belt's current condition before touching any tools. Run your finger along the belt's surface, feeling for any signs of fraying, missing teeth, or unusual wear patterns. Next, check the current tension by gently pressing on the belt's center. A properly tensioned belt should have about 3-4mm of give when pressed with moderate force. Too tight, and you risk straining your motor and bearings; too loose, and you'll experience power loss and potential belt skipping.

Prepare the Tools for Belts Tension
For this job, you'll need:
- A set of Allen wrenches (typically 3mm and 4mm)
- A flathead screwdriver
- A ruler or caliper (optional but helpful)
- Your phone's camera (for reference photos)
With the tools prepared, now let's tension the e-skateboard belt step by step:
Step-by-Step Guide to Tension Electric Skateboard Belts
Step#1 First, locate the motor mount bolts. These are usually 4-6 bolts that allow the motor to slide for tension adjustment. Slightly loosen these bolts – but don't remove them completely. You want the motor to be able to move but not freely swing around.
Step#2 With the bolts loosened, you can now adjust the tension. Most e-boards use one of two systems— a tension adjustment screw that pushes or pulls the motor, or a sliding motor mount that you position manually. Here's the key part: while holding the motor in position, test the belt tension. The ideal tension should allow for:
- About 3-4mm of deflection in the center when pressed gently
- A clear "thump" sound when plucked like a guitar string (but don't pluck too hard!)
- Smooth rotation of the wheel without binding or resistance
Step#3 Once you've achieved the right tension, carefully tighten the motor mount bolts in a cross pattern, similar to tightening car wheel lug nuts. This ensures even pressure and proper alignment.
Step#4 Final check: rotate the wheel several times by hand to ensure everything moves smoothly. Listen for any unusual sounds and watch for any binding or resistance.
Pro Tip: If you're unsure about the tension, it's better to err slightly on the looser side rather than too tight. A slightly loose belt might be noisy, but a too-tight belt can damage your motor and bearings.
After adjusting the tension, perform a stationary test by carefully running the motor (with the board safely elevated) to ensure everything runs smoothly. If you hear any unusual noises or feel resistance, double-check your work.
Now that your belt is properly tensioned, let's move on to tire maintenance, which is equally important for your riding experience...
How to Change Electric Skateboard Tires
With your belts properly tensioned, let's focus on another critical maintenance task: tire replacement.

Assess if You Actually Need New Tires First
Here's what to look for:
For Pneumatic Tires:
- Check tire pressure using a reliable gauge - most e-skateboard pneumatic tires require between 35-45 PSI
- Look for any bulges or deformations in the sidewall
- Examine the tread pattern for uneven wear
- Check for punctures or slow leaks
For Urethane Wheels:
- Look for chunks missing from the wheel surface
- Check for flat spots (a sign of aggressive braking)
- Assess if the wheel has maintained its round shape
- Look for core separation (where the urethane begins to separate from the wheel hub)
Step-by-Step Guide to Replace E-Skateboard Tires
Once you've determined you need new tires, here's how to proceed:
Step1 Wheel Removal: Begin with ensuring your board is securely elevated for safe access. Remove the wheel nuts carefully, and if your setup includes pulleys, detach the pulley system before proceeding further. Document your wheel assembly with photos – this simple step will save you time during reassembly. Keep a small container handy to organize all the tiny components you'll remove.
- For Pneumatic Tires: For pneumatic tire removal, start by completely releasing the air pressure. Grab your plastic tire levers – metal ones can damage the rim – and carefully break the tire bead. Work methodically around the rim's circumference, using gentle but firm pressure to avoid any damage. Once the tire is free, take a moment to inspect the rim thoroughly for any signs of wear or damage.
- For Urethane Wheels: When dealing with urethane wheels, your first task is removing the bearing spacers and bearings – you'll need these again, so handle them with care. If you're doing a complete wheel replacement, prepare your new wheel by installing your existing bearings. For hub motor setups, always reference your manufacturer's guide for specific instructions.
Step 2 Installing New Tires: Installing new pneumatic tires requires some finesse. Apply a generous coating of tire mounting lubricant or soapy water solution to ease the installation process. Gradually work the tire onto the rim using your levers when needed. Pay special attention to ensuring the tire bead sits correctly all around, then inflate slowly while checking for even seating.
For urethane wheel installation, use proper bearing tools to press the bearings into position. Verify that each bearing rotates smoothly without any catch or resistance. Remember to replace your speed rings and spacers in their original configuration – the order matters for optimal performance.
Step 3 Final Assembly: The final assembly stage is crucial for safety. Mount the wheel back onto your e-board, ensuring precise alignment if you're working with pulleys. Apply the manufacturer's recommended torque when tightening the nuts, then perform a thorough spin test to check for any wobble or alignment issues that need addressing.
Pro Tips:
- Always break in new tires gradually over the first few rides
- For pneumatic tires, check pressure weekly
- Keep spare tubes (for pneumatic) or wheels on hand for quick repairs
- Consider rotating your wheels periodically for even wear
Inspect Your Electric Skateboard's Belts and Tires
To keep your electric skateboard running at its best, you need to do regular maintenance. You now know how to do two of the most important maintenance jobs. Prevention is always better than repair. Always look over your tires and belts before every ride, even if it's just a quick glance. Listen to your board – unusual sounds or vibrations are often early warning signs that something needs attention. Problems can be avoided before they get worse by catching them early.


